
Scheduled Bookings Overview
You can allow customers to request or book a service in advance, but with more flexibility than a traditional reservation.
Calendar View
Tap the calendar icon on the left to access the calendar view.
 You can change the views of the calendar, such as selecting Month and turning off Timeline Views to see the entire month.

It will remember your chosen calendar settings when you come back to the calendar view on the current computer/device.
Adding Customers
Calendar View
On the calendar, tap the New Event button on the top left, or tap the day and time you want to add a new booking.
 ArrivalList View
 ArrivalList View
When adding a customer on the ArrivalList screen, you can choose the Later tab to book for a future time instead of adding them directly to the ArrivalList.

A date, phone number, and name are required. Tap the calendar icon to choose a date, and tap the clock icon to select a time.
The Check In Now option is NOT enabled by default, as you should only check in this customer once they arrive.
Approving Customers
Customers can request bookings through the website, and this can be set to require your approval.
After submitting their booking request, they will be shown this default message on the website:
You can be notified of this request by text and/or email. This is configured in Settings / Notifications.
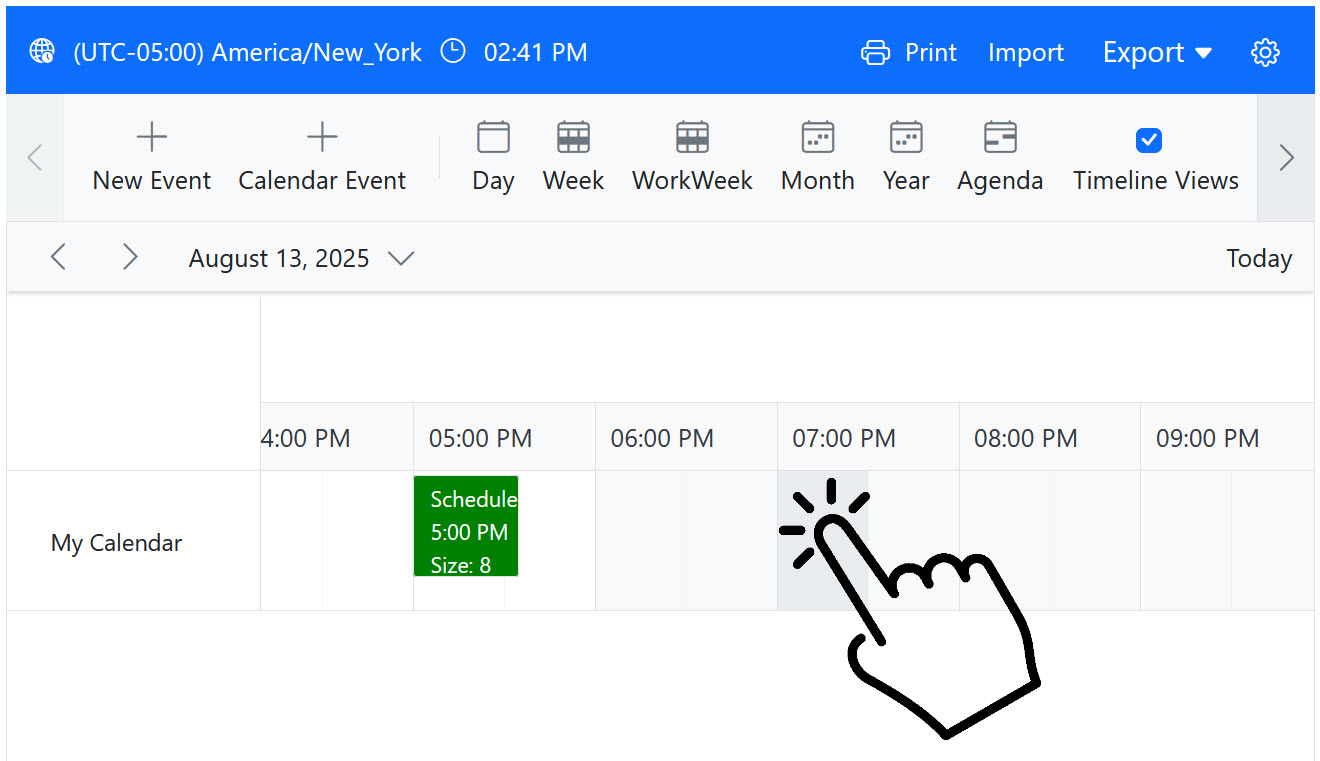
In the Calendar view, requested bookings will be shown in yellow. The following example screenshot shows 3 pending requests:

You can tap or click on a booking request, and the full details will appear on the right side.
If the customer entered a special request or set a booking time range, this will be listed in the Notes field.
Approving Requests
You can check the Approve Request box and then tap Save to approve a request. 
A confirmation text will be sent to the customer. The default message is:
The calendar entry will also be updated to green:

Declining Requests
You can check the Decline Request box and then tap Save to decline a request.
 You will be prompted to confirm you want to decline the request, and you can also change the message that will be texted to the customer.
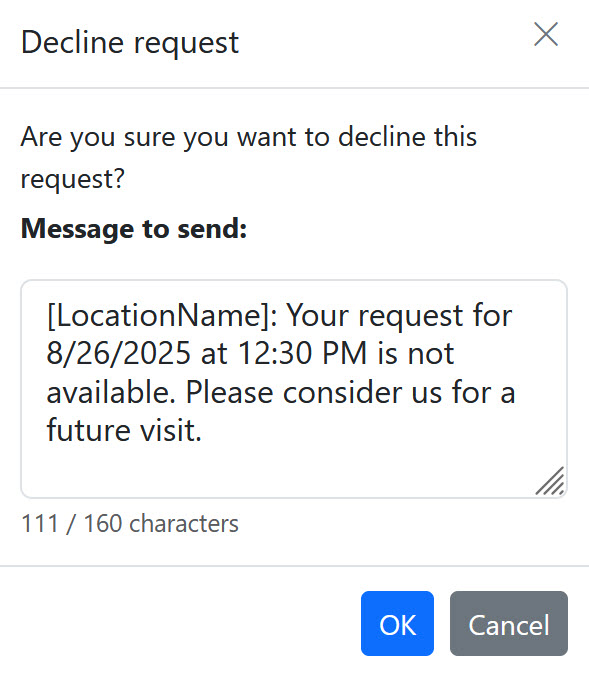
The default message is:
Once declined, the request will be removed from the calendar.
Moving to ArrivalList
In addition to being displayed in the calendar view, bookings will also be displayed in the bottom Scheduled section below the ArrivalList.
By default, scheduled items will start being displayed 12 hours (720 minutes) before their scheduled time. The amount of time they are displayed before and after their scheduled time can be changed in Settings / Portal Settings: Show Scheduled Before and Show Scheduled After (in minutes).

Bookings that require approval but have not been approved will be displayed in the Scheduled section, and you can tap the Requested status to open the screen with the option to choose Approve Request or Decline Request just like you can from the calendar view (see above for details).

 Once a scheduled/booked customer has been approved and checked in, they will be moved into the ArrivalList. If they do not check in, it will be removed 4 hours after their booking.
Add Calendar Event
Calendar Events allow you to block off timed events in your calendar to remind you and your staff when various events are taking place, like a private party, closed for a staff meeting, etc.
See the topic for Using a Calendar Event to block booking windows for more details.